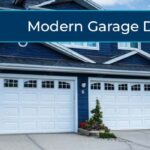
Discover seven practical garage door opener repair strategies that help you diagnose and fix common problems without immediately calling a professional. This comprehensive guide covers everything from simple power resets and electrical checks to identifying when DIY solutions work and when expert help is necessary, potentially saving you significant repair costs while getting your garage door functioning properly again.
Your garage door opener decides to quit at the worst possible moment—maybe when you’re running late for work or hauling grocycles in the rain. Before you panic or immediately call for expensive professional help, know that many opener problems have straightforward solutions you can tackle yourself.
This guide walks you through seven proven repair strategies, from quick diagnostic checks to knowing exactly when professional intervention makes sense. Whether you’re dealing with a door that won’t budge, strange grinding noises, or an opener that seems possessed, these approaches will help you troubleshoot systematically and save money where possible.
Let’s get your garage door opener back in working order.
1. Master the Power Reset and Electrical Check
The Challenge It Solves
Think your opener is completely dead? Before you assume the worst, electrical issues are often the culprit behind what seems like total failure. Power surges, tripped breakers, or loose connections can make a perfectly functional opener appear broken. This strategy helps you systematically eliminate electrical problems, which account for a significant portion of “broken” openers that actually just need a simple reset.
Many homeowners skip this fundamental step and jump straight to expensive component replacement when the fix might be as simple as flipping a switch.
The Strategy Explained
Your garage door opener is essentially a motorized appliance, and like any electrical device, it needs consistent power to function. The power reset process involves more than just unplugging and plugging back in—it’s a methodical check of your entire electrical pathway.
Start at your home’s breaker panel and work your way to the opener unit itself. Look for the dedicated circuit breaker labeled for your garage. If it’s tripped, it’ll be in a middle position between “on” and “off.” Reset it fully by switching it all the way off, then back on.
Next, check the outlet where your opener plugs in. Many garage outlets are connected to GFCI circuits, which can trip independently of your main breaker. Press the reset button on any GFCI outlets in your garage. For more detailed guidance, check out our garage door opener troubleshooting resource.
Implementation Steps
1. Locate your home’s electrical panel and identify the garage circuit breaker, then reset it by switching fully off and back on, even if it doesn’t appear tripped.
2. Inspect the power cord connection at the opener unit itself, ensuring it’s firmly seated in both the outlet and the opener’s power terminal, and look for any visible damage to the cord.
3. Unplug the opener for 30 seconds to allow the internal circuit board to fully reset, then plug it back in and test operation with the wall button first, not the remote.
4. Check for a blown fuse in the opener’s logic board if your unit has one (consult your manual), as some models include internal fuses that protect against power surges.
Pro Tips
Keep a small voltage tester in your garage toolbox to verify that power is actually reaching the outlet before you assume the opener itself is faulty. If you experience frequent power resets, consider having an electrician install a dedicated circuit for your opener—shared circuits with other high-draw appliances can cause nuisance trips.
2. Decode the Blinking Light Signals
The Challenge It Solves
Your garage door opener is trying to tell you exactly what’s wrong, but you’re missing the message. Modern openers include built-in diagnostic systems that communicate through LED blink patterns. Without understanding these codes, you’re essentially troubleshooting blind, replacing parts randomly or calling for service when the opener has already identified the problem for you.
These diagnostic codes can pinpoint issues ranging from sensor misalignment to motor overheating, saving you hours of guesswork.
The Strategy Explained
Manufacturers like LiftMaster, Chamberlain, and Genie program their openers with specific LED flash patterns that correspond to different malfunctions. The diagnostic light is typically located on the back or side panel of the opener unit itself.
The system works through a series of blinks followed by a pause, then the pattern repeats. For example, one flash-pause-repeat might indicate a sensor issue, while four flashes could signal a problem with the safety reversing system. Each manufacturer uses slightly different patterns, which is why keeping your owner’s manual accessible is crucial.
These codes eliminate the trial-and-error approach to repairs. Instead of checking every possible component, you can zero in on the exact system that’s malfunctioning. Understanding the signs of garage door repair indicators helps you respond quickly to problems.
Implementation Steps
1. Locate the diagnostic LED on your opener unit, usually found near where the wire terminals connect, and watch it for at least 30 seconds to observe the complete blink pattern.
2. Count the number of flashes before each pause, writing down the pattern (for example, “3 flashes, pause, repeat”), then consult your owner’s manual or manufacturer’s website for the code translation.
3. Cross-reference the blink code with your specific model number, as codes can vary even within the same brand family, and note whether the light is solid, flashing, or off completely.
4. Address the identified issue according to the code’s meaning, then clear the error by unplugging the opener for 30 seconds before testing to see if the problem is resolved.
Pro Tips
Take a quick video of the blinking pattern with your phone—this makes it easier to count flashes accurately and provides documentation if you need to contact customer support. If you’ve lost your manual, most manufacturers provide PDF downloads on their websites using your model number, which is usually printed on a label attached to the opener unit.
3. Realign and Clean Your Safety Sensors
The Challenge It Solves
Your door closes partway then reverses back up, or refuses to close at all even though you can hear the opener motor running. This frustrating behavior almost always points to safety sensor problems. These photo eye sensors became mandatory under UL 325 standards to prevent the door from closing on people, pets, or objects, but they’re also sensitive to misalignment, dirt, and environmental factors.
Sensor issues are among the most common garage door opener complaints, yet they’re also one of the easiest to fix yourself.
The Strategy Explained
Safety sensors work by projecting an invisible infrared beam across your garage door opening. One sensor sends the beam, the other receives it. If anything breaks that beam while the door is closing, the opener immediately reverses direction.
The sensors are mounted on brackets about six inches above the floor, one on each side of the door. When they’re properly aligned, small LED lights on each sensor glow steadily. Misalignment, dirt on the lens, or physical damage can interrupt the beam and prevent normal operation.
Environmental factors matter too. Direct sunlight hitting the sensors, spider webs across the beam path, or even condensation on the lenses can trigger false obstruction readings.
Implementation Steps
1. Check the LED indicator lights on both sensors—they should be solid, not flickering or off, with most systems using green or amber lights to indicate proper alignment and connection.
2. Clean both sensor lenses with a soft, dry cloth to remove dust, cobwebs, or water spots that might be interfering with the infrared beam, and ensure nothing is physically blocking the line of sight between sensors.
3. Loosen the wing nuts holding each sensor bracket and gently adjust the sensors so they point directly at each other, tightening them when both indicator lights show solid illumination.
4. Verify the sensor wires are securely connected at both the sensor and the opener unit, looking for any frayed wires or loose terminals that could cause intermittent connection problems.
Pro Tips
Use a level to ensure both sensors sit at exactly the same height—even a slight vertical offset can cause alignment headaches. If you’re constantly battling sensor misalignment, check the mounting brackets themselves; garage door vibration over time can loosen the screws holding brackets to the wall. A dab of thread-locking compound on these screws prevents future drift.
4. Reprogram Your Remote and Wall Controls
The Challenge It Solves
Your wall button works fine, but your remote does nothing. Or maybe the remote worked yesterday but suddenly stopped responding today. Signal and programming issues between your controls and the opener unit can develop from battery failure, interference from other devices, or simple memory loss in the system.
Rather than buying new remotes or assuming your opener’s receiver is broken, reprogramming often restores full functionality in minutes.
The Strategy Explained
Modern garage door openers use rolling code technology, where the remote and opener exchange a new security code with each use. This prevents code grabbing by potential intruders, but it also means the remote and opener need to stay “in sync” with each other.
The programming process essentially reintroduces your remote to the opener’s memory. Most systems can store multiple remote codes, allowing you to program car remotes, handheld clickers, and keypad units all to the same opener. If you’re considering an upgrade, explore the advantages of smart garage door openers for enhanced connectivity features.
The specific programming sequence varies by manufacturer, but the general principle remains consistent: you put the opener into “learn mode,” then send a signal from the remote within a specific time window.
Implementation Steps
1. Replace the battery in your remote first, as weak batteries are the most common cause of remote failure, and test whether this alone solves the problem before proceeding with reprogramming.
2. Locate the “learn” or “program” button on your opener unit, typically found near the antenna wire or on the back panel, and press it until the indicator light turns on or blinks.
3. Within 30 seconds of pressing the learn button, press and hold the button on your remote that you want to program until the opener’s light blinks or you hear a click, confirming the code has been stored.
4. Test the newly programmed remote from various distances and angles to ensure reliable operation, and repeat the process for any additional remotes or keypads you need to program.
Pro Tips
If you’re programming a car’s built-in HomeLink system, you may need to hold the car’s programming button and your handheld remote simultaneously near the car’s receiver to capture the signal before programming it to the opener. Keep one programmed remote in a safe place inside your home as a backup—if you ever need to clear all remote codes for security reasons, you’ll have a master to reprogram from.
5. Adjust Force and Travel Limit Settings
The Challenge It Solves
Your garage door closes but then immediately reopens, or it stops several inches short of fully closing. Maybe it reverses when there’s nothing in the way, or it strains and grinds when reaching the fully open position. These behaviors signal that your opener’s force and limit settings need adjustment.
These settings control how far the door travels and how much resistance triggers the safety reverse feature. Over time, seasonal temperature changes, door balance shifts, or simple wear can throw these calibrations off.
The Strategy Explained
Your garage door opener has two critical adjustment mechanisms: travel limits and force settings. Travel limits tell the opener exactly where to stop when opening and closing. Force settings determine how much resistance the opener tolerates before assuming it’s hit an obstruction and reversing.
These adjustments typically appear as dial controls or small screws on the opener’s side panel, labeled “up limit,” “down limit,” “up force,” and “down force.” Some newer models use electronic programming through the wall button instead of physical dials.
Think of it like calibrating your opener to your specific door’s weight, balance, and travel distance. A perfectly adjusted opener should close firmly against the floor without excessive force, and open completely without straining or overshooting. Issues with door balance often relate to garage door spring problems that affect overall system performance.
Implementation Steps
1. Locate the limit adjustment controls on your opener unit, usually marked with arrows or plus/minus symbols, and identify which controls the up limit and which controls the down limit.
2. For a door that doesn’t close completely, turn the down limit adjustment clockwise in quarter-turn increments, testing after each adjustment until the door reaches the floor with appropriate pressure.
3. Adjust the force settings if your door reverses unnecessarily by increasing the down force slightly, but never set force so high that the safety reverse feature fails to work when you place an obstruction under the door.
4. Test your adjustments by placing a 2×4 board flat on the floor in the door’s path—the door should reverse within two seconds of contacting the board, confirming your safety reverse still functions properly.
Pro Tips
Make adjustments in small increments and test thoroughly between each change. Overdoing force adjustments can create safety hazards, while extreme limit settings can cause the door to slam or strain the opener motor. If you find yourself making major adjustments, your door may have a balance problem with the springs rather than an opener setting issue—that’s a job for a professional.
6. Inspect and Replace Worn Drive Components
The Challenge It Solves
You hear grinding, scraping, or slipping sounds when your opener runs. The motor engages but the door barely moves, or it jerks and stutters during operation. These symptoms point to mechanical wear in your opener’s drive system—the belt, chain, or screw mechanism that physically moves your door.
Drive components wear gradually over thousands of cycles, and catching deterioration early prevents complete failure and potential damage to other opener parts.
The Strategy Explained
Garage door openers use three main drive types: chain drive, belt drive, or screw drive. Each has specific wear patterns and maintenance needs. Chain drives use a metal chain similar to a bicycle chain, which can stretch and develop worn links. Belt drives use a reinforced rubber belt that can crack or fray. Screw drives use a threaded steel rod that can accumulate debris or develop worn threads.
The drive system connects your motor to the door trolley, translating motor rotation into linear door movement. When these components wear, you lose efficiency and create stress on the motor itself. Understanding garage door opener motors and their features helps you identify when components need attention.
Regular inspection catches problems before they escalate from minor wear to complete failure. A slightly stretched chain is a simple adjustment; a broken chain means your door won’t open at all.
Implementation Steps
1. Disconnect power to the opener and manually open the door halfway, then inspect the full length of your chain, belt, or screw for visible damage like cracks, rust, stretched links, or missing teeth.
2. Check chain or belt tension by pressing on the drive at its midpoint—it should deflect about half an inch, with excessive sag indicating needed adjustment using the tension adjustment mechanism near the motor unit.
3. Examine the drive sprocket or pulley where the chain or belt connects to the motor, looking for worn teeth or grooves that could cause slipping, and clean away any accumulated grease or debris.
4. For screw drive systems, clean the threaded rod with a dry cloth and apply a thin coating of lithium-based grease to ensure smooth trolley movement along the entire length of the rail.
Pro Tips
Listen to your opener regularly—changes in sound often indicate developing problems before they become visible. Chain drives benefit from annual lubrication with white lithium grease, but belt drives should never be lubricated as this causes premature deterioration. If you’re replacing a chain or belt, consider upgrading to a belt drive system for quieter operation, though this typically requires replacing the entire rail assembly.
7. Know When to Call a Professional
The Challenge It Solves
DIY repairs save money and build confidence, but certain garage door opener issues carry serious safety risks or require specialized tools and expertise. Attempting these repairs yourself can result in injury, property damage, or creating bigger problems than you started with.
Knowing where to draw the line between DIY and professional help protects both you and your investment in your garage door system.
The Strategy Explained
Professional intervention becomes necessary when repairs involve high-tension springs, structural door issues, or complete opener replacement. Torsion springs, in particular, store tremendous energy—enough to cause severe injury or death if they release unexpectedly during amateur repair attempts.
Professionals bring more than just expertise; they carry proper tools, replacement parts, and liability insurance. They can diagnose complex problems that might stump a homeowner, and they understand building codes and safety standards that govern garage door installation. Learn more about when to DIY or call a pro for garage door repair to make informed decisions.
The cost of professional service often proves less expensive than the combined cost of tools, parts, and potential damage from incorrect DIY attempts on complex repairs.
Implementation Steps
1. Never attempt spring replacement or adjustment yourself, as torsion springs operate under extreme tension that requires specialized winding bars and training to handle safely.
2. Call a professional if your opener is more than 15 years old and experiencing multiple problems, as replacement often makes more financial sense than repeated repairs on aging equipment. Consider reading about when to repair or replace your garage door opener motor for guidance.
3. Seek expert help for any structural issues with the door itself, including bent tracks, damaged panels, or doors that appear unbalanced when you disconnect the opener and manually lift them.
4. Contact a professional when you’ve systematically tried the appropriate DIY fixes without success, bringing your documentation of what you’ve already attempted to save diagnostic time and cost.
Pro Tips
Look for garage door companies that specialize in service and repair rather than just installation—they’ll have deeper troubleshooting expertise. Ask about their warranty on both parts and labor before authorizing work. A reputable professional should be willing to explain what they found, show you the problem if possible, and discuss your options rather than simply pushing for the most expensive solution. Explore top professional garage door repair services to find reliable solutions in your area.
Putting It All Together
Tackling garage door opener repair doesn’t have to feel overwhelming. Start with the simplest fixes—power resets and sensor cleaning—before moving to more involved adjustments. These foundational steps resolve the majority of common opener problems without requiring any specialized tools or technical knowledge.
Keep your opener’s manual handy for model-specific guidance, particularly when interpreting diagnostic blink codes or locating adjustment controls. If you’ve misplaced the original manual, a quick search with your model number usually turns up a PDF version on the manufacturer’s website.
Never hesitate to call a professional when safety is on the line. Spring-related repairs, structural door issues, and complete opener replacement fall firmly in the expert category. The money you save on DIY repairs becomes meaningless if you’re injured attempting something beyond your skill level.
Regular maintenance prevents most problems from developing in the first place. Consider scheduling seasonal check-ups to keep everything running smoothly—a quick inspection of sensors, drive components, and safety features takes minutes but extends your opener’s lifespan significantly.
Your garage door opener works hard every day, cycling through dozens of operations in all weather conditions. A little attention goes a long way toward keeping your home secure and your daily routine uninterrupted. When you approach repairs systematically, you’ll find that most issues have straightforward solutions that restore reliable operation without breaking the bank.
And if you need any help at any point, give our team a call!
[general_phone]