When your garage door won’t open or close, most issues fall into a few predictable categories with surprisingly simple fixes you can troubleshoot yourself in minutes. This practical guide walks you through the most common causes of stuck garage doors, starting with quick DIY solutions before moving to problems requiring professional repair—helping you diagnose the issue faster than finding a technician’s phone number.
You’re already running ten minutes late. You hit the garage door button, grab your coffee, and—nothing. The door sits there, silent and stubborn. You press again. Still nothing. Now you’re stuck choosing between being even later or backing out of the driveway in reverse while your neighbors watch.
We’ve all been there. A garage door that won’t open or close ranks right up there with a dead car battery on the list of perfectly-timed household annoyances. The good news? Most garage door problems fall into a handful of predictable categories, and several have fixes you can tackle yourself in less time than it takes to find a repair company’s phone number.
Let’s walk through what’s likely happening with your door and how to get it moving again. Think of this as your garage door triage guide—we’ll start with the simplest explanations and work our way up to the issues that need professional attention.
The Usual Suspects: Most Common Causes of a Stuck Garage Door
Before you assume the worst, let’s check the obvious stuff first. You’d be surprised how often the solution is simpler than you think.
Power Problems: Start by checking if your opener has power. Look for a small LED light on the motor unit itself—if it’s dark, you’ve found your culprit. Walk over to your breaker box and see if the garage circuit has tripped. Sometimes a power surge or overload flips that switch without you realizing it. While you’re at it, make sure the opener is actually plugged in. It sounds silly, but cords get accidentally unplugged when you’re moving stuff around in the garage more often than you’d expect.
If you recently had a power outage, your opener might need a reset. Some models get a bit confused after the power comes back and need you to cycle the wall button or unplug the unit for thirty seconds before plugging it back in.
The Photo-Eye Sensor Mystery: Here’s where things get interesting. Since 1993, federal safety standards have required garage doors to have photo-eye sensors—those little boxes mounted near the floor on each side of your door opening. They shoot an invisible beam across the doorway, and if anything breaks that beam, the door won’t close.
This safety feature prevents your door from crushing pets, kids, or that bicycle you forgot to move. But it also means a misaligned or dirty sensor can stop your door cold. Look at those sensors right now. Do you see a small LED light on each one? On most systems, a solid light means everything’s fine, while a blinking light screams “Houston, we have a problem.” If your garage door won’t close all the way, sensors are often the first thing to check.
Sometimes one sensor gets bumped slightly out of alignment—maybe you knocked it with the lawnmower, or it shifted over time. Even a quarter-inch misalignment breaks the beam. Dust, cobwebs, or water spots on the sensor lens can cause the same issue. We’ll talk about fixing this in a minute.
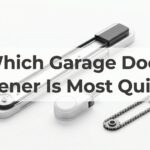
Remote and Keypad Headaches: Your remote might be the problem, not the door itself. Dead batteries are the number one cause of “broken” remotes. Pop that cover off and swap in fresh batteries—you’d be amazed how many service calls get canceled after this simple fix.
If new batteries don’t help, try the wall button inside your garage. Does that work? If yes, your remote needs reprogramming to the opener. If the wall button also fails, the issue lies with the opener itself or its power supply.
Signal interference can also mess with modern openers, especially smart models with WiFi connectivity. Nearby electronics, LED light bulbs in the opener, or even your neighbor’s new wireless system can create interference. Try standing closer to the opener when pressing the remote—if it works up close but not from the driveway, interference is your likely troublemaker.
Mechanical Problems That Stop Your Door in Its Tracks
When simple fixes don’t solve the problem, you’re likely dealing with a mechanical issue. These require more attention—and in some cases, professional help.
Broken Springs Tell a Dramatic Story: Garage door springs do the heavy lifting—literally. They counterbalance the weight of your door, which can tip the scales at 150 to 400 pounds depending on size and material. Most residential doors use torsion springs mounted above the door opening, and these springs are wound incredibly tight.
When a spring breaks, you’ll usually know it. Many homeowners report hearing a loud bang that sounds like a gunshot or a car crash in the middle of the night. That’s the spring snapping and releasing all its stored tension at once. If you missed the dramatic moment, look for these telltale signs: a visible gap in the spring coil, a door that feels impossibly heavy when you try to lift it manually, or a door that opens a foot or two and then slams back down.
Torsion springs typically last around 10,000 cycles. If you open and close your door four times daily, that’s roughly seven years of service. Cold weather accelerates wear because metal contracts and becomes more brittle in freezing temperatures.
Track Troubles: Your garage door rides on metal tracks mounted to the walls on each side. These tracks need to stay perfectly aligned and clear of debris to function properly. Over time, tracks can bend from impact—maybe you bumped them with your car, or someone leaned something heavy against them.
Bent tracks create friction points where rollers struggle to move smoothly. In severe cases, rollers can jump completely off the track, leaving your door crooked and stuck. You’ll usually hear grinding or scraping sounds if your door is fighting damaged tracks.
Debris buildup causes similar problems. Dirt, leaves, small stones, or hardened grease can accumulate in the track channels and block roller movement. Sometimes the rollers themselves wear out—the wheels can crack, or the bearings can seize up from lack of lubrication. Understanding common garage door opener problems helps you identify whether the issue is mechanical or electrical.
Cable Complications: Lift cables work alongside your springs to raise and lower the door safely. These steel cables run through pulleys and attach to the bottom corners of your door. When a cable frays, loosens, or snaps completely, your door loses its balanced support.
A broken cable often causes one side of the door to hang lower than the other, creating a crooked appearance. You might hear a slapping sound as the loose cable whips around. In some cases, a snapped cable wraps around the pulley or gets tangled in the spring mechanism, creating a dangerous mess.
Cable problems frequently occur alongside spring issues because both components experience similar stress cycles. If your springs are original to your home and you’re seeing cable wear, consider having both systems evaluated together.
Quick Fixes You Can Safely Try Right Now
Let’s tackle the problems you can actually solve without special tools or risking injury. These fixes handle the majority of garage door complaints.
Sensor Realignment and Cleaning: Grab a soft cloth and a step stool. Start by wiping down both sensor lenses—they’re usually behind a small plastic cover. Remove any dust, cobwebs, or water spots that might block the beam.
Now check the alignment. Each sensor should point directly at its partner across the doorway. Most sensors mount on brackets with adjustment screws or wing nuts. Loosen these fasteners slightly—just enough that you can gently move the sensor. Point it directly at the sensor on the opposite side, then tighten everything back down.
Look at the LED indicator lights. A solid green light typically means that sensor is receiving power and detecting the beam. A solid red or yellow light means it’s powered but not aligned. Adjust until both sensors show solid lights—that’s your signal that the beam is connected. For more detailed steps, check out our garage door opener troubleshooting guide.
Here’s a pro tip: sunshine can actually interfere with sensors. If your door works fine at night but acts up during sunny afternoons, try shading the sensors or adjusting their angle slightly to reduce glare.
Manual Release and Operation: Every garage door opener includes an emergency release mechanism—usually a red handle hanging from a cord attached to the opener carriage. This lets you disconnect the door from the motor and operate it manually.
Pull down on that red handle. You’ll hear a click or snap as the carriage releases. Now you can lift the door by hand. If the door lifts smoothly and stays open when you raise it halfway, your springs are probably fine and the problem lies with the opener. If the door crashes down or feels incredibly heavy, you’ve likely got a spring issue.
To reconnect the door to the opener, close the door completely, then pull the release handle toward the door (not down). Press your wall button or remote—the carriage should travel along the rail and reconnect with the door mechanism automatically.
Remote Troubleshooting: We mentioned batteries earlier, but let’s go deeper. After installing fresh batteries, you might need to reprogram your remote. Find the “learn” or “program” button on your opener motor unit—it’s usually behind the light cover or on the side panel.
Press and release this button. An indicator light will turn on or blink. Within 30 seconds, press and hold the button on your remote until the opener light blinks or you hear a click. That’s it—your remote is now synced.
For keypads mounted outside, the process is similar but often requires entering a PIN. Check your opener’s manual for the specific sequence, as these vary by manufacturer.
Warning Signs That Require Professional Attention
Some garage door problems fall firmly into “don’t try this at home” territory. Knowing when to step back and call for help keeps you safe and prevents minor issues from becoming expensive disasters.
Spring and Cable Repairs Are Seriously Dangerous: Let’s be direct about this—garage door springs are under extreme tension. We’re talking about hundreds of pounds of force wound into a metal coil. When that force releases unexpectedly, it can cause severe injuries including broken bones, lacerations, and worse.
Thousands of people end up in emergency rooms each year from DIY garage door spring accidents. Professional technicians use specialized tools and safety equipment designed specifically for handling high-tension components. They also know how to properly wind new springs to the exact tension your door requires.
The same caution applies to cables. A snapped cable under tension can whip around with enough force to cause serious harm. If you see frayed cables, loose cables, or a cable that’s come off its pulley, step away and call a professional.
Motor Failure Versus Simple Fixes: How do you know if your opener motor is dying versus having a fixable problem? Listen and smell for clues. A grinding noise from the motor unit suggests worn gears inside the opener—a common issue with older chain-drive models. This requires motor disassembly and gear replacement. Learn more about when to repair or replace your garage door opener motor to make the right decision.
A burning smell is never good. It indicates overheating from a motor struggling against too much resistance or from failing electrical components. Shut off power to the opener immediately if you smell burning plastic or electrical odors.
If your opener makes no sound at all when you press the button—no clicking, no humming, nothing—check power first. If power is good, the motor’s circuit board might have failed. Modern openers rely on electronic control boards that can fail from power surges or simply wear out over time.
Sometimes the opener runs but the door doesn’t move. This often means the drive gear that connects the motor to the chain or belt has stripped out. You’ll hear the motor running, but nothing happens. This repair requires opener disassembly and parts replacement.
Off-Track Doors Need Expert Realignment: A door that’s jumped its tracks is a serious situation. The door’s weight is no longer properly supported, creating stress on mounting brackets and the opener itself. Trying to force an off-track door back into place can bend the tracks further, damage the door panels, or cause the entire door to fall.
Professionals have the equipment to safely support the door’s weight while realigning tracks and reseating rollers. They’ll also inspect for the underlying cause—maybe the tracks were already bent, or the rollers were worn out and finally gave way.
Preventing Future Garage Door Failures
An ounce of prevention beats a pound of emergency repairs, especially when those repairs involve being stuck outside at seven in the morning. Regular maintenance catches small problems before they become big headaches.
Monthly Visual Inspections: Once a month, spend five minutes really looking at your garage door system. Watch the door go through a complete cycle. Does it move smoothly, or does it jerk and hesitate? Listen for new sounds—grinding, scraping, or squealing noises signal developing problems.
Look at the springs above your door. Check for rust, gaps in the coils, or signs of stretching. Examine the cables running from the bottom corners of your door up to the pulleys. Are they frayed? Do you see broken wire strands? Inspect the rollers—they should spin freely without wobbling.
Check the tracks for dents, bends, or debris buildup. Make sure all mounting brackets are tight and nothing has worked loose. These quick visual checks help you spot wear patterns before components fail completely. Following smart strategies for garage door opener repair can extend the life of your system significantly.
Seasonal Lubrication and Balance Testing: Every three to four months, lubricate your garage door’s moving parts. Use a silicone-based or lithium-based garage door lubricant—not WD-40, which is a solvent rather than a lubricant and can actually attract dirt.
Apply lubricant to the springs, rollers, hinges, and track sections. A light coating is all you need—too much attracts dust and creates gunk buildup. Wipe away any excess.
Test your door’s balance twice a year. Disconnect the opener using the manual release, then lift the door halfway and let go. A properly balanced door should stay in place or move very slowly. If it drops quickly, your springs need adjustment. If it shoots up, they’re wound too tight. Either situation means it’s time for professional spring service.
Cold weather deserves special attention. Winter temperatures cause metal to contract and lubricants to thicken. If your door struggles more in winter, check that all moving parts are properly lubricated with a cold-weather appropriate product.
Annual Professional Maintenance: Even with diligent DIY care, annual professional inspections provide value. Technicians can spot subtle wear patterns you might miss, properly adjust spring tension, and catch safety issues before they become hazards.
Professional maintenance typically includes spring adjustment, complete lubrication, safety sensor testing, opener force adjustment, and hardware tightening. Many companies offer maintenance plans that include priority service if something breaks—worth considering if you rely heavily on your garage door. If your opener is aging, you might also explore a garage door opener replacement as part of your long-term plan.
Think of professional maintenance as insurance. The cost of an annual tune-up is significantly less than an emergency service call, and regular maintenance extends your door’s lifespan considerably. Components that might last seven years with neglect can easily reach ten or twelve years with proper care.
Getting Your Door Back in Action
A garage door that won’t open or close disrupts your entire routine, but now you understand the common culprits behind these failures. Many issues trace back to simple causes—dead batteries, misaligned sensors, or tripped breakers—that you can fix yourself in minutes.
When mechanical problems arise, knowing the difference between safe DIY fixes and dangerous repairs keeps you out of the emergency room. Cleaning sensors and replacing remote batteries? Go for it. Replacing springs or cables? That’s firmly in the professional category.
The key is responding methodically rather than panicking. Start with the simplest explanations first. Check power, test sensors, replace batteries. If those quick fixes don’t work, evaluate whether you’re dealing with a mechanical issue that requires professional attention.
Regular maintenance prevents most garage door emergencies before they happen. Monthly visual inspections, seasonal lubrication, and annual professional tune-ups keep your door operating smoothly through thousands of cycles. Pay attention to warning signs like unusual noises, slower operation, or visible component wear—catching these early saves money and prevents inconvenient breakdowns.
If your garage door is showing any of the warning signs we’ve discussed, or if your quick troubleshooting attempts haven’t solved the problem, don’t wait for a complete failure. Learn more about our services and schedule an inspection. We’ll diagnose the issue, explain your options clearly, and get your door back to reliable operation—so the next time you’re running late, your garage door won’t be the reason.